|
|
|
Governor Ned Lamont |
 |
| Home | About Us | Help | Contact | ||
|
LOGIN SELF-SERVICE HRMS FINANCIALS EPM SECURITY TRAINING DAILY MAIL CATALOG OF REPORTS STARS |
|
|
 |
 |
|
|
Catalog of Online Reports
Running Online Reports
Purpose
The purpose of this document is to provide step by step instructions for running online reports in Core-CT. Most online reports are run in a similar manner with the same fields, pages and processes. Therefore, running online reports can be broken down into three basic steps:
- Enter a Run Control ID
- Enter Report Parameters
- Run the Report
1. Run Control ID
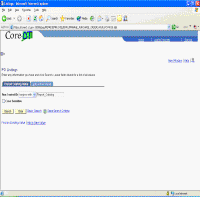
When an online report is selected from the Core-CT menu, a Run Control ID page is displayed. This page allows the user to select an existing run control ID or to add a new one. For reports that are run on a regular basis, user should select a Run Control ID naming convention that can be easily identified (e.g. PO_List_Status). This same run control ID can be used each time the report is processed. These reports should be saved. By saving the report to a particular run control ID, the report parameters are saved and the report can be rerun at any time.
For reports that are one time events, the user can use a "generic" run control ID to run a wide variety of reports. These reports do not need to be saved.
The screenshot below is an example of a Run Control ID page. The page contains two tabs: one for finding an existing run control ID, and one for adding a new value. The page also gives the user the ability to search for existing run control IDs. Once a user creates a new run control ID, it is added to a list of existing IDs that are specific to a Core-CT user ID and logon. Run control IDs can not be deleted, so it is important to establish a naming convention that can be easily identified and effectively managed.
Example of a Run Control ID page (click to enlarge):
2. Enter Report Parameters
Once the run control ID is established, the report parameters screen appears. The fields that must be entered on this page differ slightly from report to report, but the look and feel of the screen is very similar for most online reports. Typically, the page has two sections: report request parameters and Chartfields selection.
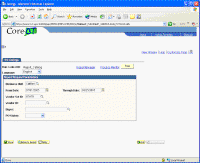
The report request parameters section has required and optional fields. The user must enter input criteria in the required fields. These fields are preceded by an asterisk on some reports. Common fields include Business Unit, date range, user ID, etc. When the user inputs selection criteria into fields in this section, the scope of the report is narrowed. By leaving fields blank, the report displays all of the data for a given parameter.
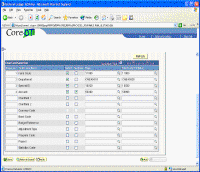
The Chartfield selection section allows the user to specify Chartfield combination(s). Some reports offer the ability to specify ranges of chartfields, while others limit the user to one combination. Specifying chartfield combinations narrows the scope of the report. Often it is recommended that the user specify the agency’s department values and/or business unit. Otherwise, the report displays data for all agencies; the output is too large and can adversely affect the overall performance of the system. Chartfield selection criteria are needed when the user is investigating transactions based on coding.
The screenshots below are examples of report request parameters and chartfield selection sections of the run control page. Please note that input criteria are added to field in several ways. For example, the user can type in the input criteria, use a magnifying glass or calendar icon to lookup and select, or use a dropdown menu to select.
Example of a report request parameters section (click to enlarge):
Example of a Chartfield selection section (click to enlarge):
3. Run the Report
Once the report parameters are entered, it is time to run the report. Below is a table that outlines the steps to follow for running online reports.
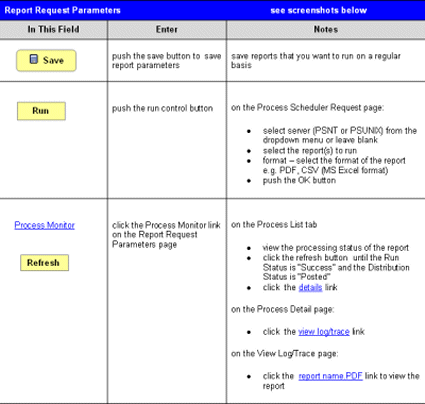
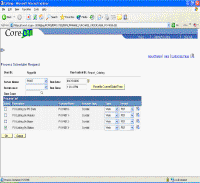
The following are examples of the various screens (mentioned in the table above) used to run a report:
Process Scheduler Request page
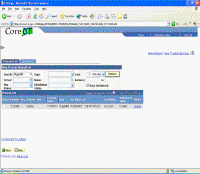
Process List tab (click to enlarge):
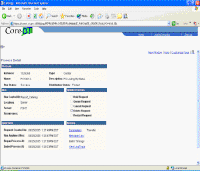
Process Detail Page (click to enlarge):
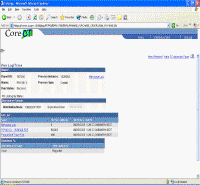
View Log/Trace Page (click to enlarge):
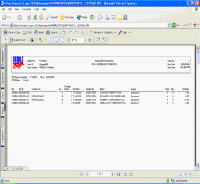
Example of Report Output
Example of rows generated for a PO Listing by PO Status report.
|
Home
|
CT.gov Home
|
Send Feedback
|
Login
State of Connecticut Disclaimer, Privacy Policy, and Web Site Accessibility Policy Copyright © 2002-2020 State of Connecticut |

|

